That may not be necessary. You may be able to write code that applies a multiplier to the raw sensor value before ADC conversion so that it scales according to your preferences. The LinnStrument (128) has such a feature called Touch Sensor Prescale.
If you are looking to go the Striso route, note that the thickness of material between the sensors and your fingers will matter, as it directly affects the amount of pressure and precision required. This is one reason why I modified my LinnStrument to use bamboo fabric as a playing surface.
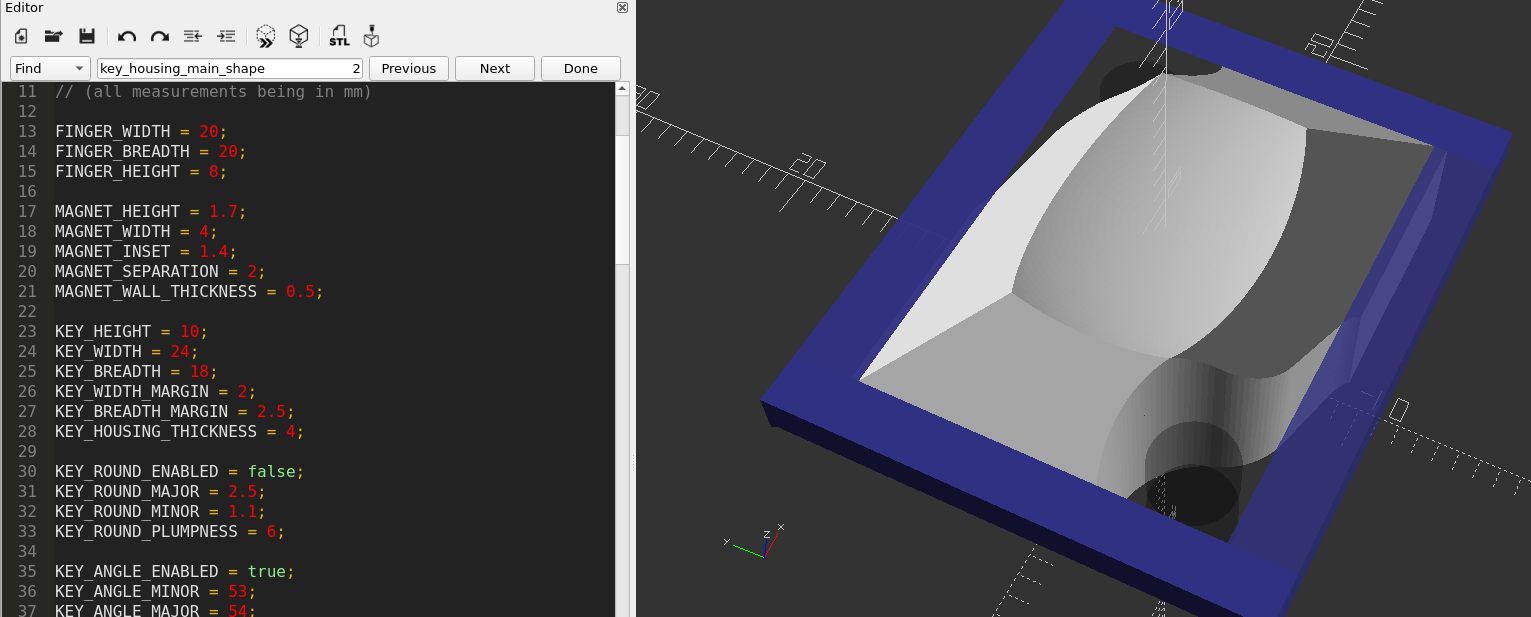
This seems like a fairly low-effort way to check viability on a single key before investing deeper in the project. And I can share my findings here with you all, including any OpenSCAD files I produce for my 3D-printed prototypes.
Maybe after a bit of iteration to prove the concept, others may want to collaborate with me on furthering the design.
What can I say, I truly believe you should give the Striso a try It works well for chords, but also really well for melodies. All diatonic notes next to each other, but still having the chromatics around for spicing things up (without having to change modes).
As for different versions, I’d love to have a three row 25 key Striso like the left hand of the Striso box, also described in the same paper, but then with regular size keys, those ultra small knobs don’t work so well. Such a board would fit very well on the neck of a guitar/violin/double bass like instrument, with the regular Striso board lower on the body. And I see a lot of potential for the combination of the a small left hand keyboard and a bigger right hand keyboard in other form factors.
When stretching the Striso in my mind I get the Bosanquet layout, which is the main layout of the Lumatone. I’d love to see a stretched Bosanquet Striso for sure, but probably won’t develop it.
Note that the version of the Striso I describe in the Nime paper is quite outdated.
The current version uses fingered pcb button pads and a single sheet of linqstat. Use a gold plated pcb and clean both the pcb and the linqstat with alcohol as that makes a big difference. This picture from the kickstarter campaign shows the inside of a prototype that’s quite close the the current version:
Hmmmm… those are actually like 30-35% smaller than what I had been planning, so I’ll have to redesign things a bit (the size of the magnets I’m using is fixed).
A few quick notes on electronics considerations, both for my own tracking, as well as in case they are useful to anyone else out there:
PCBWay is a popular provider of custom order prototype PCBs in the DIY community, but a quick price comparison shows that JLCPCB is considerably cheaper.
Just like I’m using the I2C bus for the 3D Hall effect sensors that will measure expressive button positions, I can also use the I2C bus for controlling dimmable LEDs - even full-color flexibility of dimming RGB or RGBA LEDs.
There are a variety of I2C-based LED drivers/controllers available that support I2C control, with different features, etc.
It’s advantageous to have a driver that supports more channels, so I can save on I2C addresses, as well as chip count.
This Kinect KTD2064 chip is an interesting one - it has its own dimming fade logic should will save a lot of bandwdith on the I2C bus (leaving more bandwidth for expressive button measurement) It also multiplexes the LED pins in a clever way that saves on pin count and trace/routing complexity, at the expense of some potential “ghosting” artifacts (e.g. showing red/green in nearby LEDs when one LED is pure blue)
It may be more economical to consider sacrificing the “cool” factor of dimmable RGB LEDs in favor of simple on/off LEDs that can handle just a few colors (I think the Eigenharp just has red and green only?)
If I use a single I2C bus for all the buttons and all the LEDs, I will definitely run out of I2C addresses (128 max) - at least, if I have as many buttons as the Eigenharp Alpha
As a workaround, I can look for a microcontroller as the central brain that has multiple independent I2C buses implemented in it.
It’s also important to take I2C max capacitance into account - the longer the I2C traces and the more devices I put on it, the more the capacitance of those elements can compromise the I2C bus quality, to the point where it eventually breaks down.
Here is a detailed doc from TI that discusses this phenomenon, and how using an I2C buffer/repeater can be a workaround for isolating parts of the I2C line. Need to finish reading that doc in detail to get more info on caveats/considerations.
There are PCB layout techniques that can mitigate the effect and reduce the capacitance between the I2C line and ground, such as keeping the traces well-separated on the PCB layout, and avoiding an underlying ground plane.
3D-Printing the keys in clear PETG material can make the keys themselves act as a light-pipe for the LED underneath
I’ve lusted after an Eigenharp for years, finally decided to take a different approach and make something that had the same function, different method.
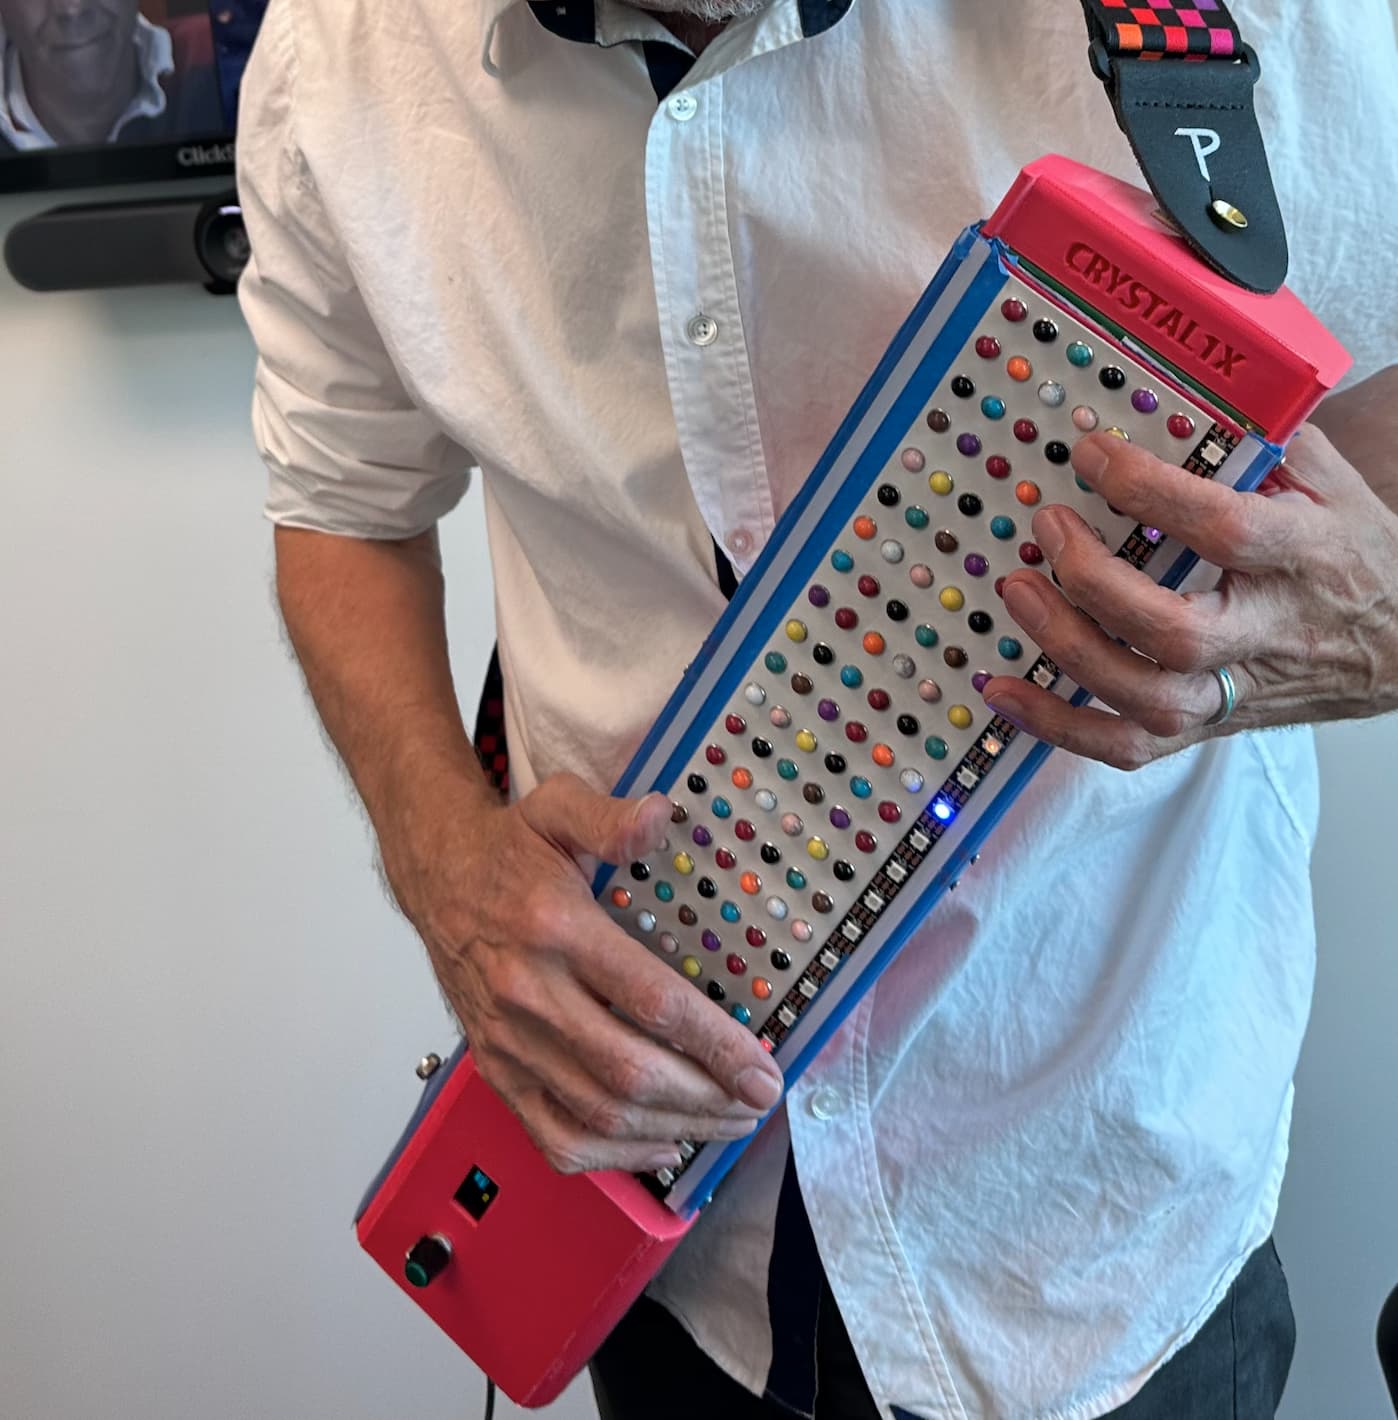
I used to play Chapman stick until the weight of it was killing my back. So I made a matrix instrument that mimics it, top part is tuned in inverted 5ths, bottom part in 4ths…like the Chapman, and so far I have pitch bend on every note and MPE, but not much luck with the “Y” axis. I was thinking of selling it as a kit because it’s pretty straight forward to build, but the patent stuff out there is a bit frightening.
Welcome! This looks fascinating! Do you use a similar approach as Eigenlabs with lasers deflected by glass prismas below each key? I don’t know what the patent you mean covers - but the Eigenharp approach was pretty unique, if you do it differently then it is perhaps not a problem? Otherwise - asking John to get a (perhaps free for limited amounts of kits) license might not hurt, I guess he rather wants to see more such instruments in the wild.
I don’t think it’s affected by the Eigenlabs patents, but there are others. This uses a piezo layer, and there are a whack of patents on piezo materials used for MIDI instruments, though the way I’m using it is unique in the way the software handles things and make the instrument extremely responsive. There are 8 individual controlled parameters from each interaction with those buttons, and its supports gestural movements of the performer. I can’t go into it too much because I have to figure out whether I need a provisional patent just to prove I’m not violating anyone else’s patent! I hate patent law. The result anyway is a very responsive instrument, you can touch it lightly, pound it, and its super fast. MPE is really nice with MPE synths, I love being able to control string sounds individually with finger pressure. Building it has been my weekend vacation for months
Here it is in control mode, no MPE. Control mode is that some of the buttons have been assigned to midi controls and others to performance. (Other modes allow for more Chapman stick two handed style)
Also, I like the idea of having a single LED strip on the side instead of trying to put LEDs in each button/key. I was running into logistical concerns with the number of LED driver channels I’d need for putting LEDs in each, but using one RGB LED per row seems much more tractable.
Hi, I just found this thread and I’m wondering if you’d be willing to share any info on how development of this ended up going? Coincidentally, my youtube algorithm just showed me this:
It probably lacks the satisfying vertical travel aspect of a mechanical key like the Riskable void switches but perhaps both designs could be combined somehow to achieve the 3d input with the mechanical key tactility.
Thanks for sharing that link. @jaecexd. I hadn’t thought about using a thin/flexible 3d-printed “floating” frame for each key. I wonder how that would hold up under repeated musician use though? Maybe each key top would need to be easily swappable in case it breaks. It was definitely cool to see them using a 3D Hall effect sensor though, just as I was planning to.
Regarding my own DIY work in this thread - I haven’t worked on this in some months - it’s been on the back burner compared to other projects.
The latest progress I made was that I prototyped a single floating magnet key with my 3d printer, using the TIMAG5273 evaluation module, and some small magnets I bought.
I think I proved the concept somewhat - was able to get some nice input. However, I found that the key would often get “stuck” instead of consistently returning to its “home” state when I was done pressing it. My guess was that this was caused by the ridges that were artifacts of how the 3d printing is done in strands of filament. To eliminate the ridges would require some sanding, of both the keys and the “docking holes” where the keys slide back into their home position.
I still think it’s a cool idea, and would like to pursue it someday.
However, today I just purchased a used Eigenharp Alpha in this thread, so it’s less likely that I’ll want to put a lot of time into this DIY project if I end up fully satisfied with the “real Eigenharp experience”.


")