Agree about the plastic type. I am printing several size holes at first to try and figure out what will work best with different plastics. Seems like most buttons use #6 or #8 screws.
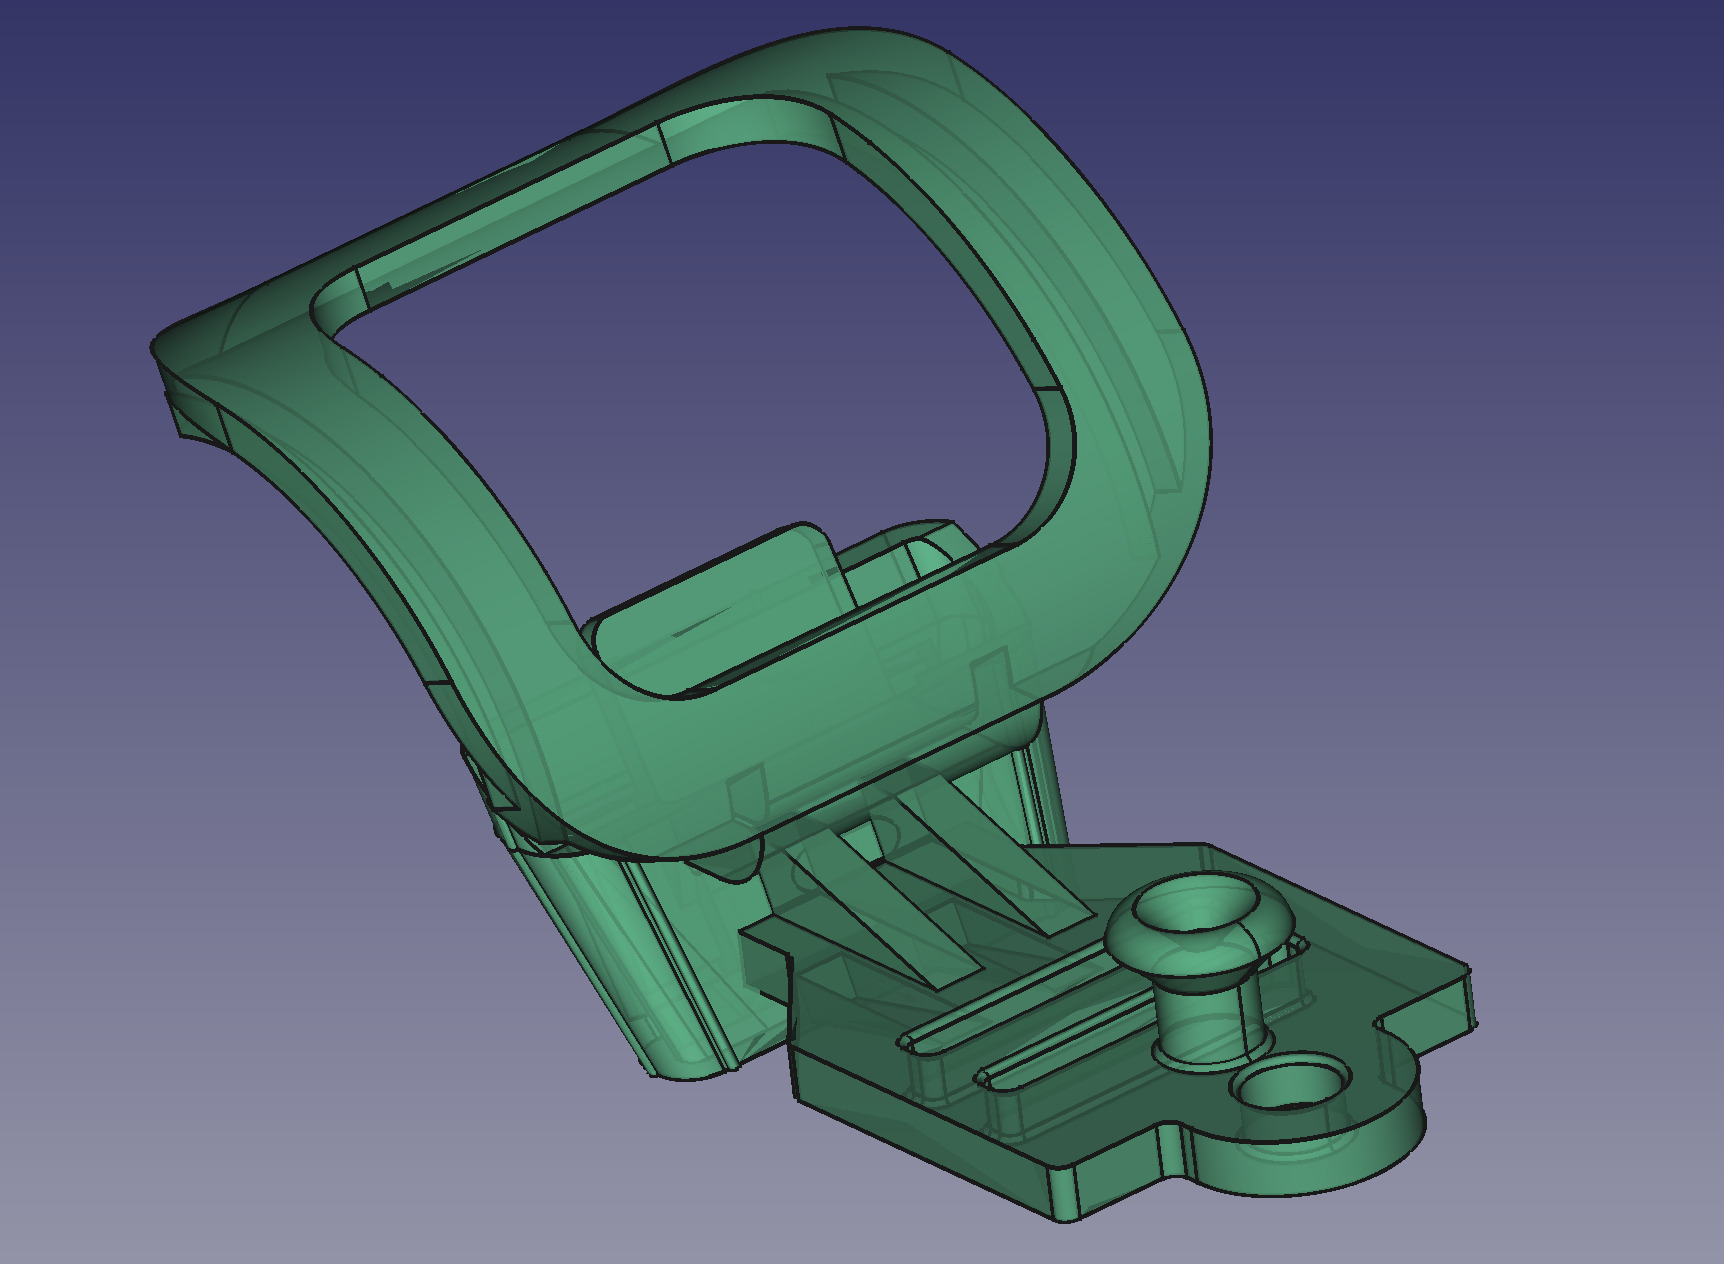
As for the the sturdiness, yes I agree, this first version omits all the reinforcement to save plastic since I’ll probably have to iterate on the dimensions. My initial idea was to also extend the horizontal part of the standoff all the way back to the block. I think the backplane should be flush with the Tau body. The bracket it clips onto is recessed a little bit from where the backplane is, so the backplane cannot be exactly even with the bottom of the clip section.
I was thinking in the final design to have both perpendicular and parallel bored screw holes on the block so that it could be used with guitar buttons or an eye that you could clip a neck strap to. I’m really curious to see what the balance is like for the different options.
I probably will also try a simpler version that screws directly in to the body. Unfortunately the stock screws are quite short, so they limits the thickess of the plastic to ~1.2mm. Sourcing alternate screws could help with that.
Hopefully will get a test print done tomorrow to report back on!
Thanks! With that, I test printed the bracket in PLA and the adapter in PETG and did a test fit. The dimensions are pretty close, I think one more iteration and I’ll be within the accuracy of my friend’s printer. After that I’ll probably have to pay to get a sintered part, but that will be in nylon.
The adapter print wasn’t too great but here’s a pic with the stuff connected. This material definitely does not hold any appreciable weight!
Another update… I got sidetracked the last month but I did do a second print which more or less works. I will probably do one more print in PETG to finalize the dimensions and then send it out to a local shop for a nylon print with SLS or MJF.
I did another print in PETG on a home printer. It has a bunch of print errors but they’re all cosmetic and don’t affect the functionality.
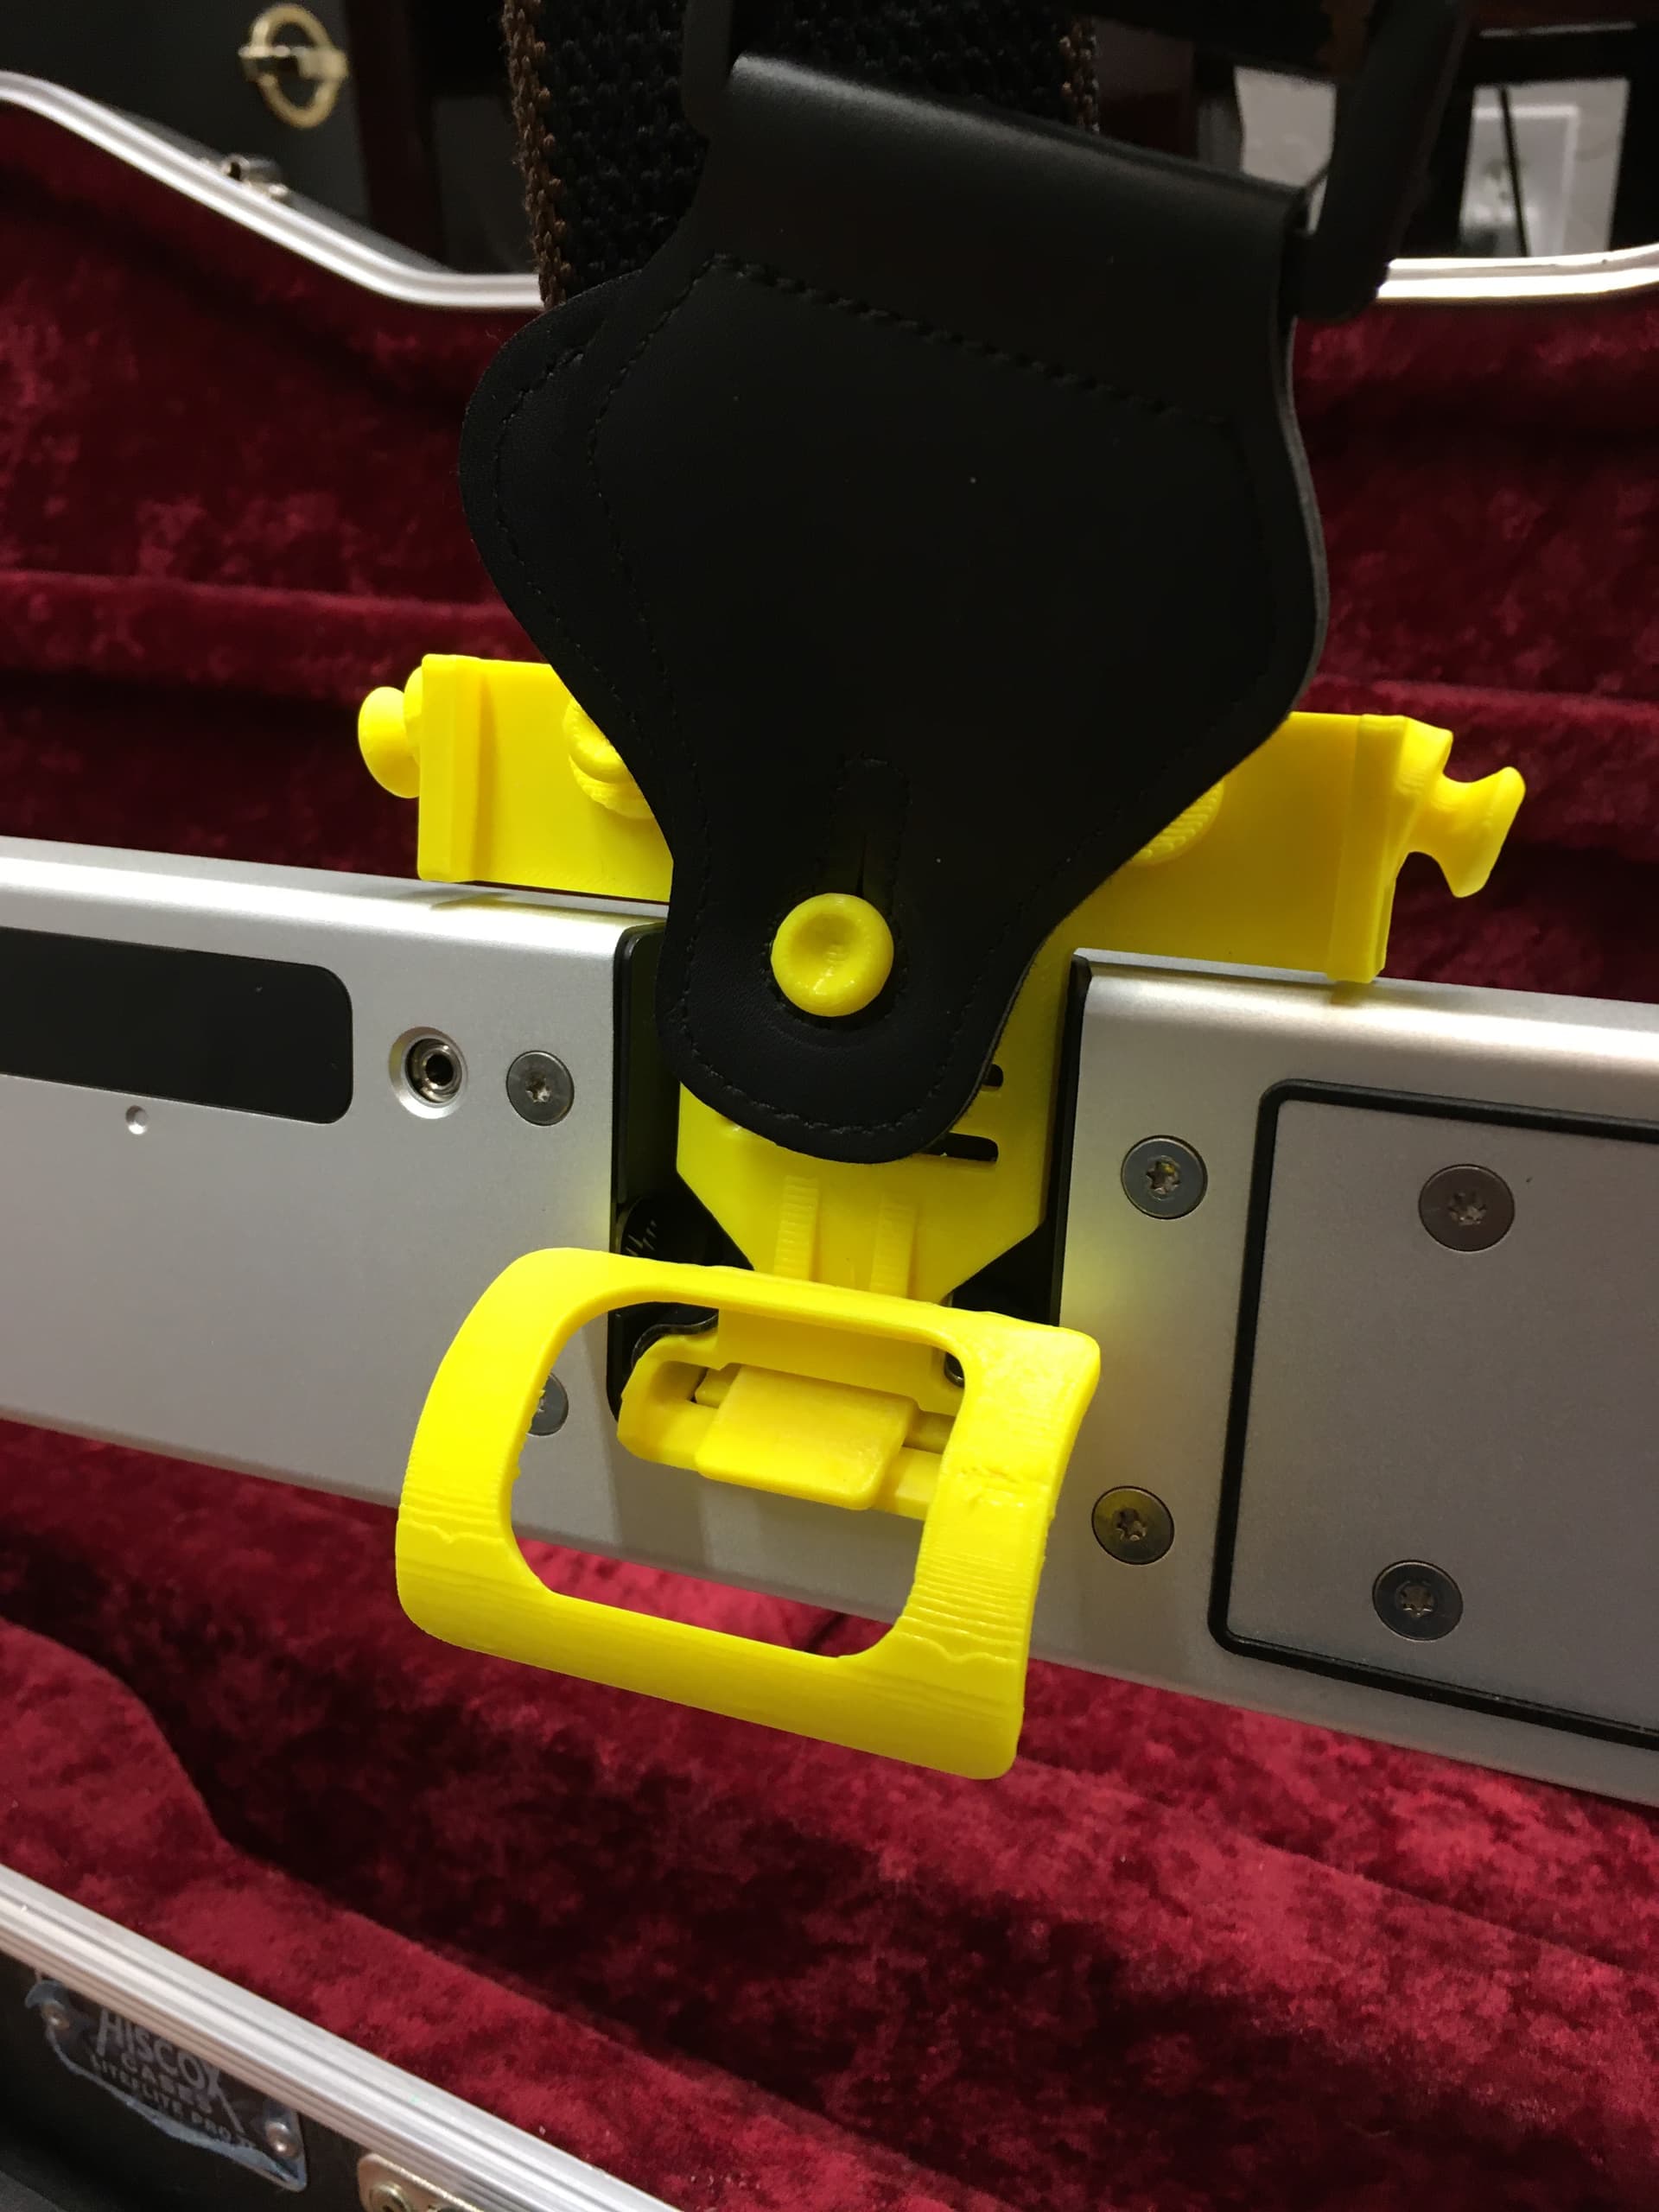
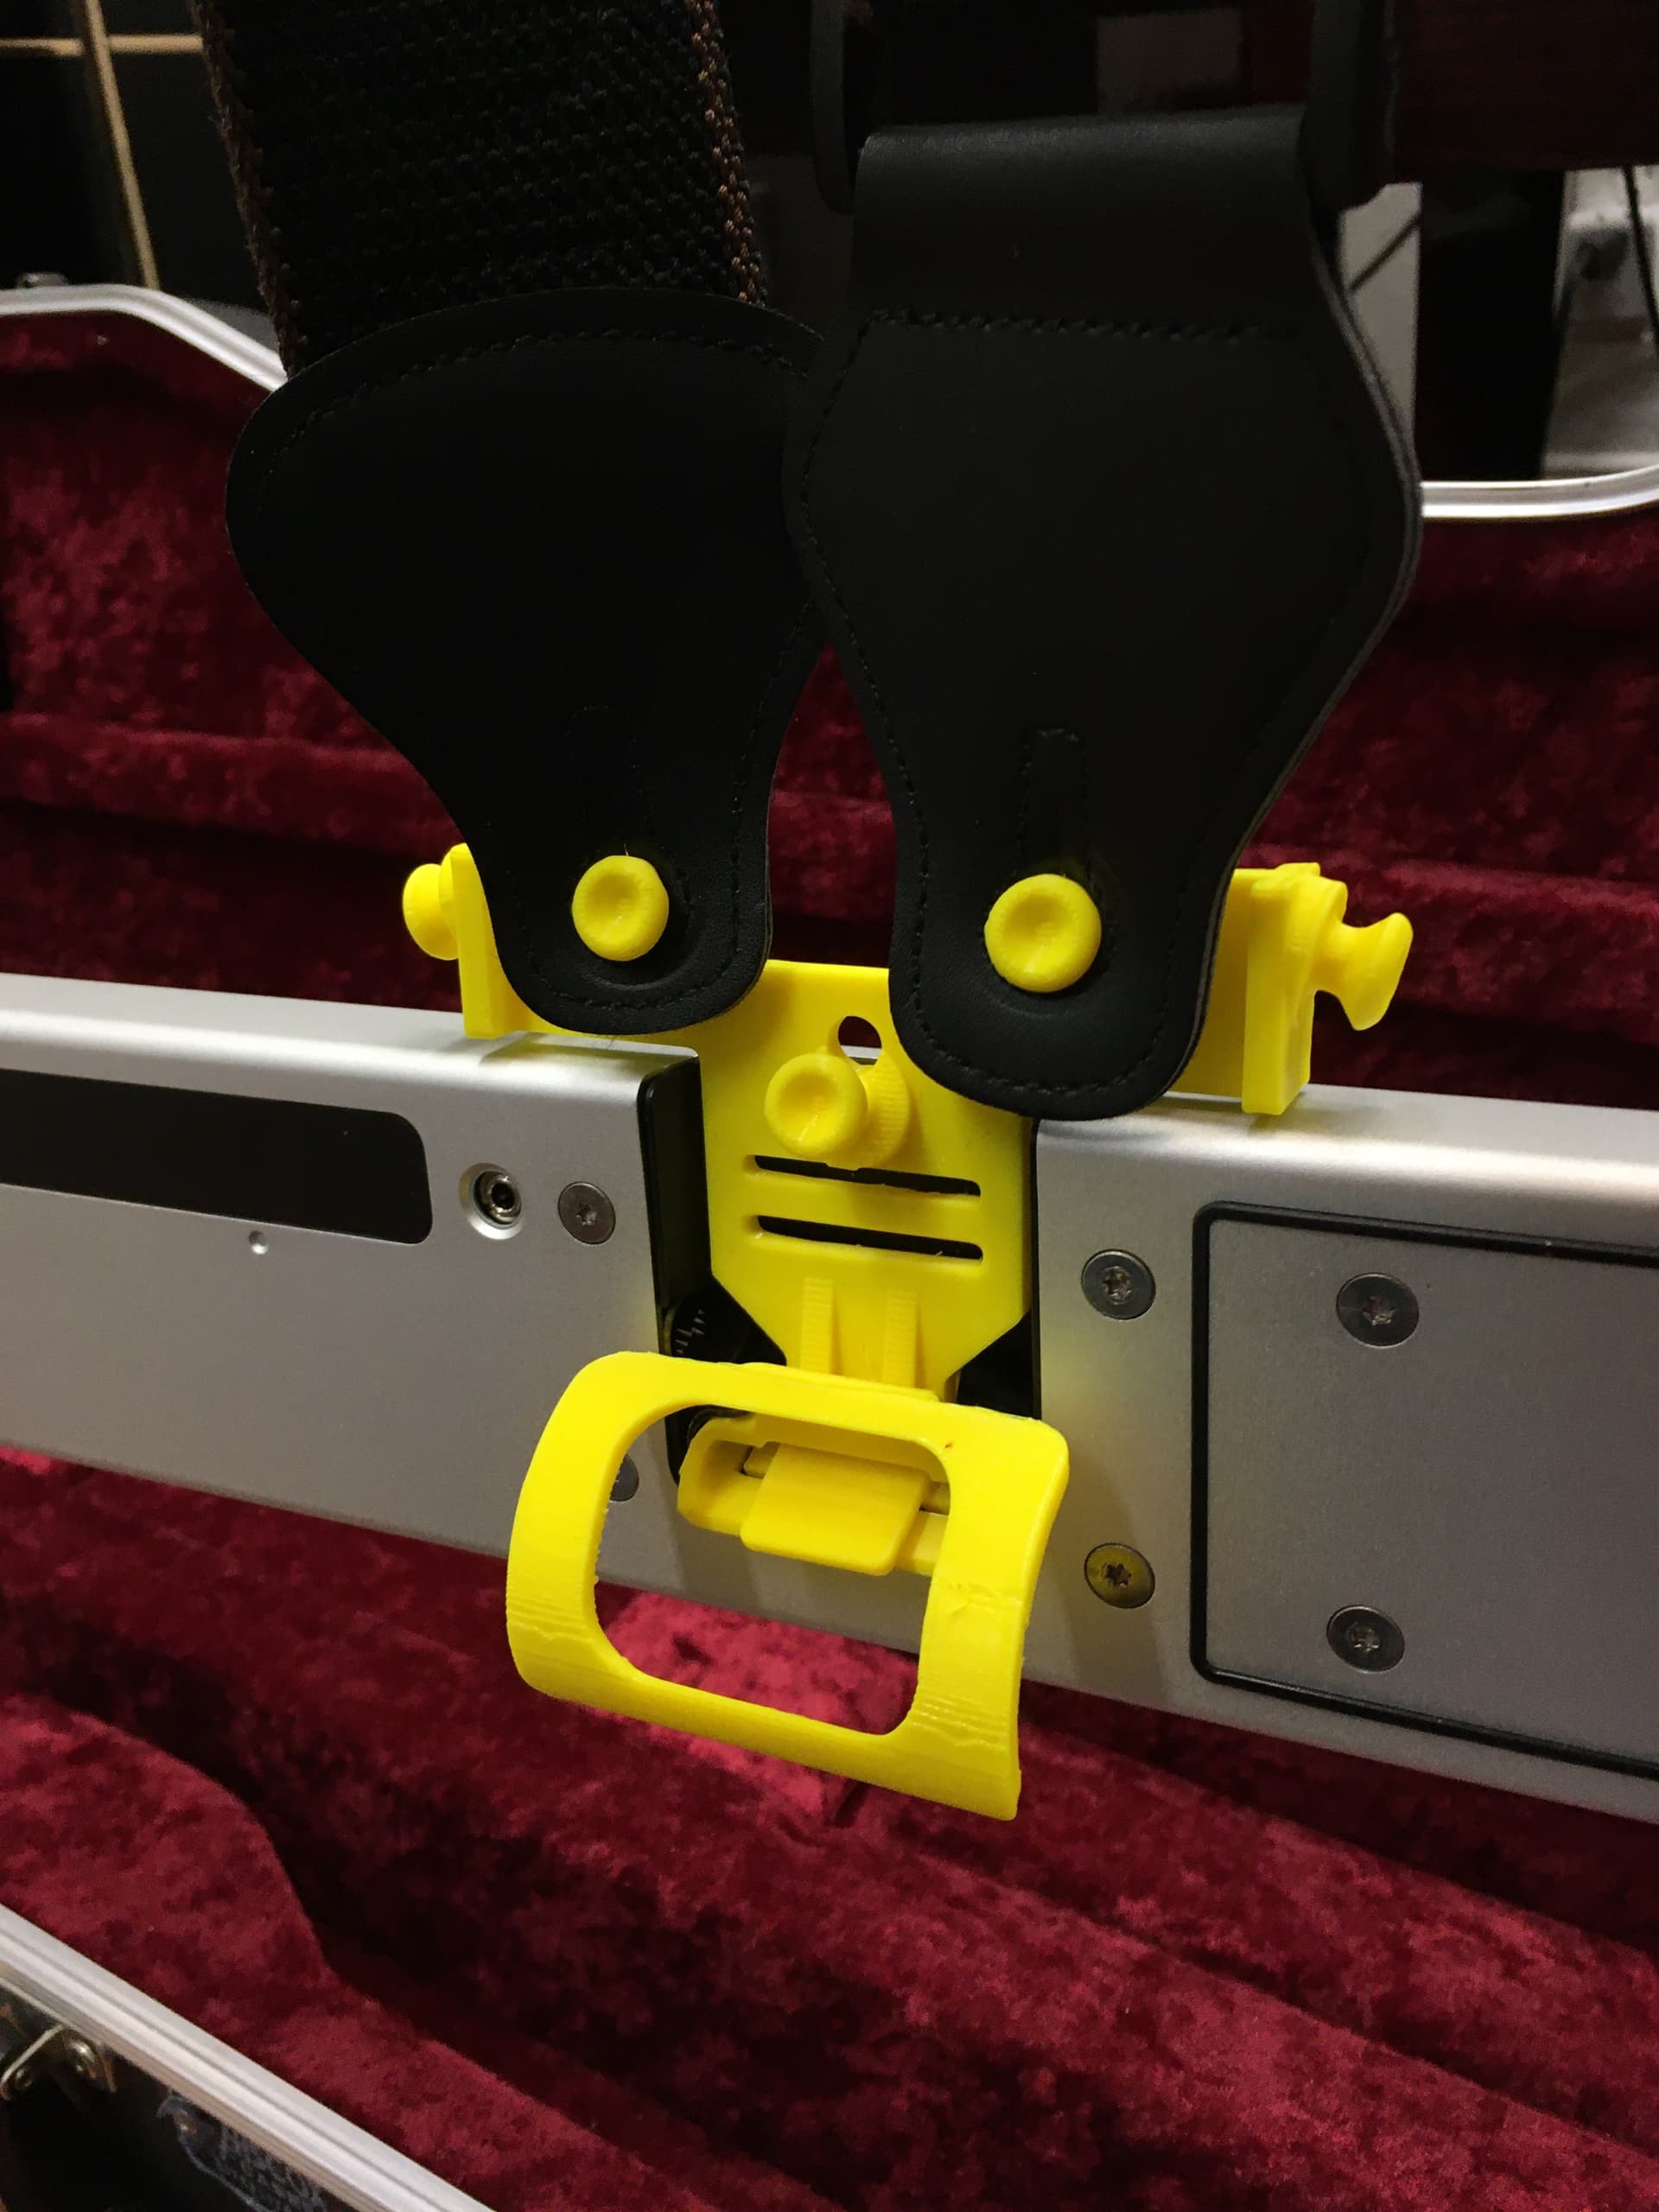
This version is totally solid and hangs just like a guitar. It pivots easily and the neck strap configuration also works. The standoff does its job keeping it offset from the body. The last pic is of it suspended by the strap.
Time soon to do a professional print in nylon. I might make some cosmetic changes so it’s less ugly. If anyone has any other suggestions please let me know! The next print will have a proper hole pattern including side holes for a proper neck strap mount.
I’d be especially interesting in hole sizing suggestions because I’m not too familiar with the variety of buttons/hardware people would use. Since it will be solid nylon, they will probably be pilots so the end user can ream them out to the right size (or maybe no holes at all?). Also the current hole depth (both horizontal and vertical) is 15mm which doesn’t seem like enough to accomodate all options.
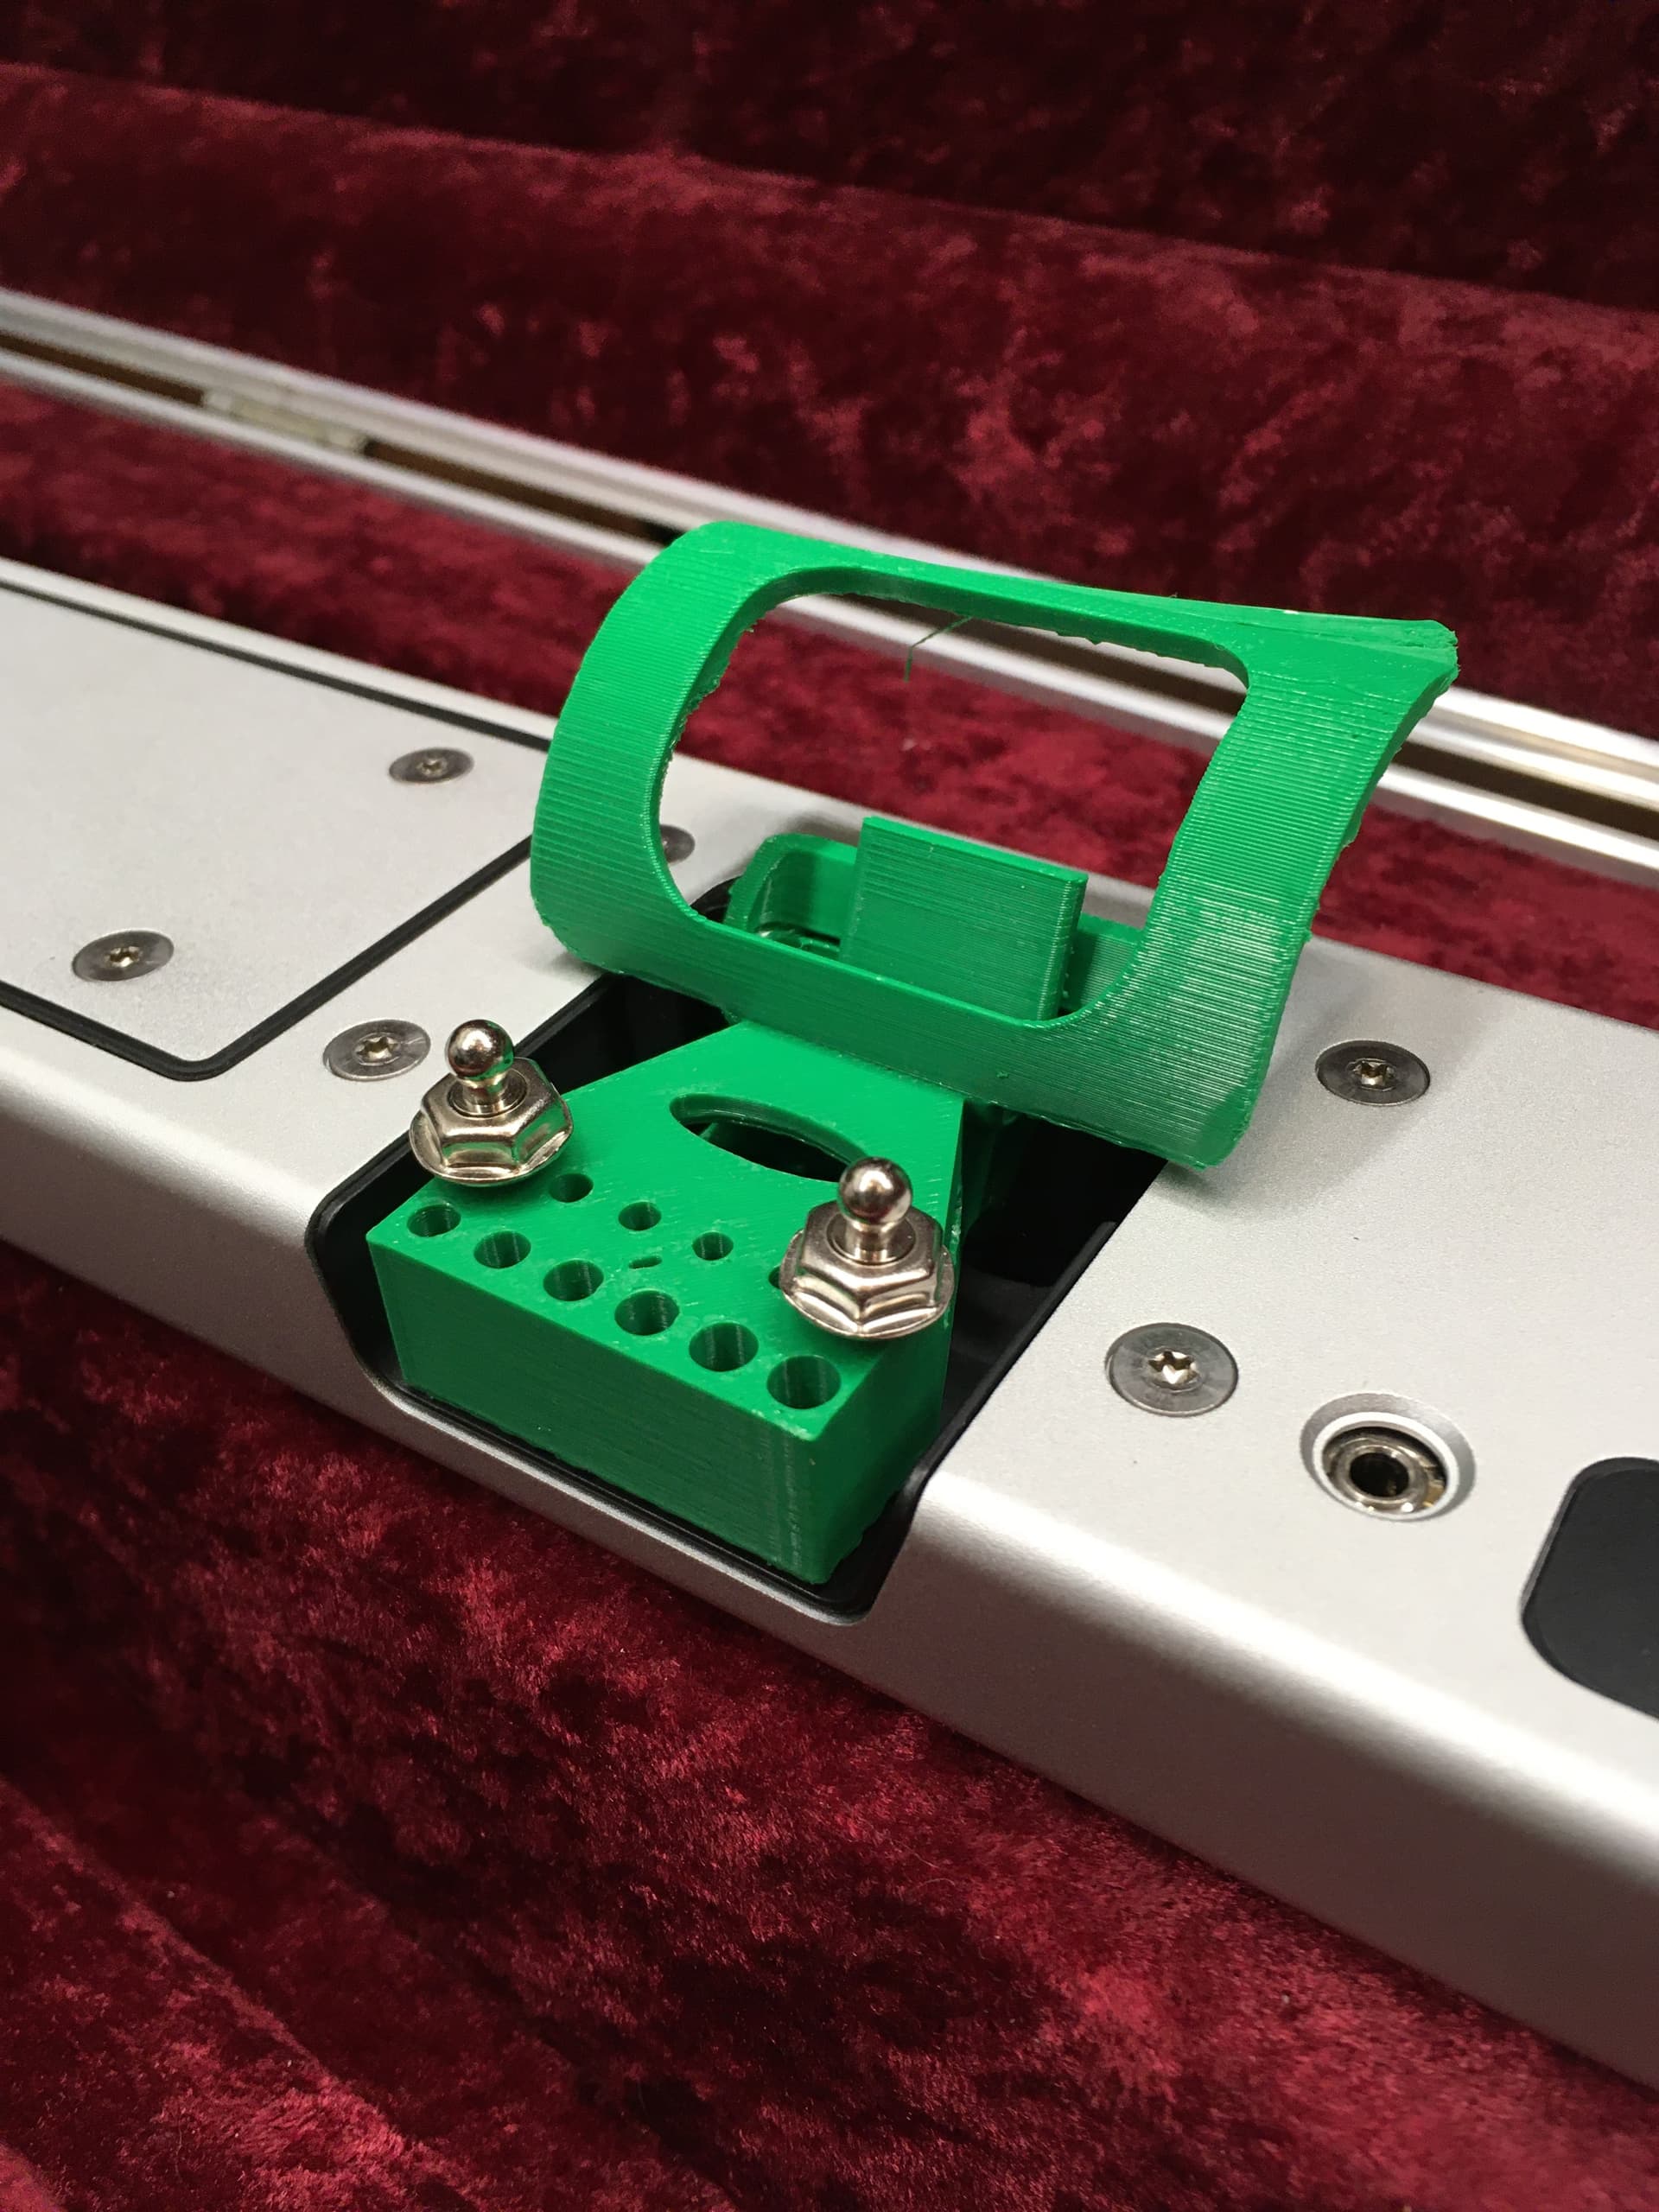
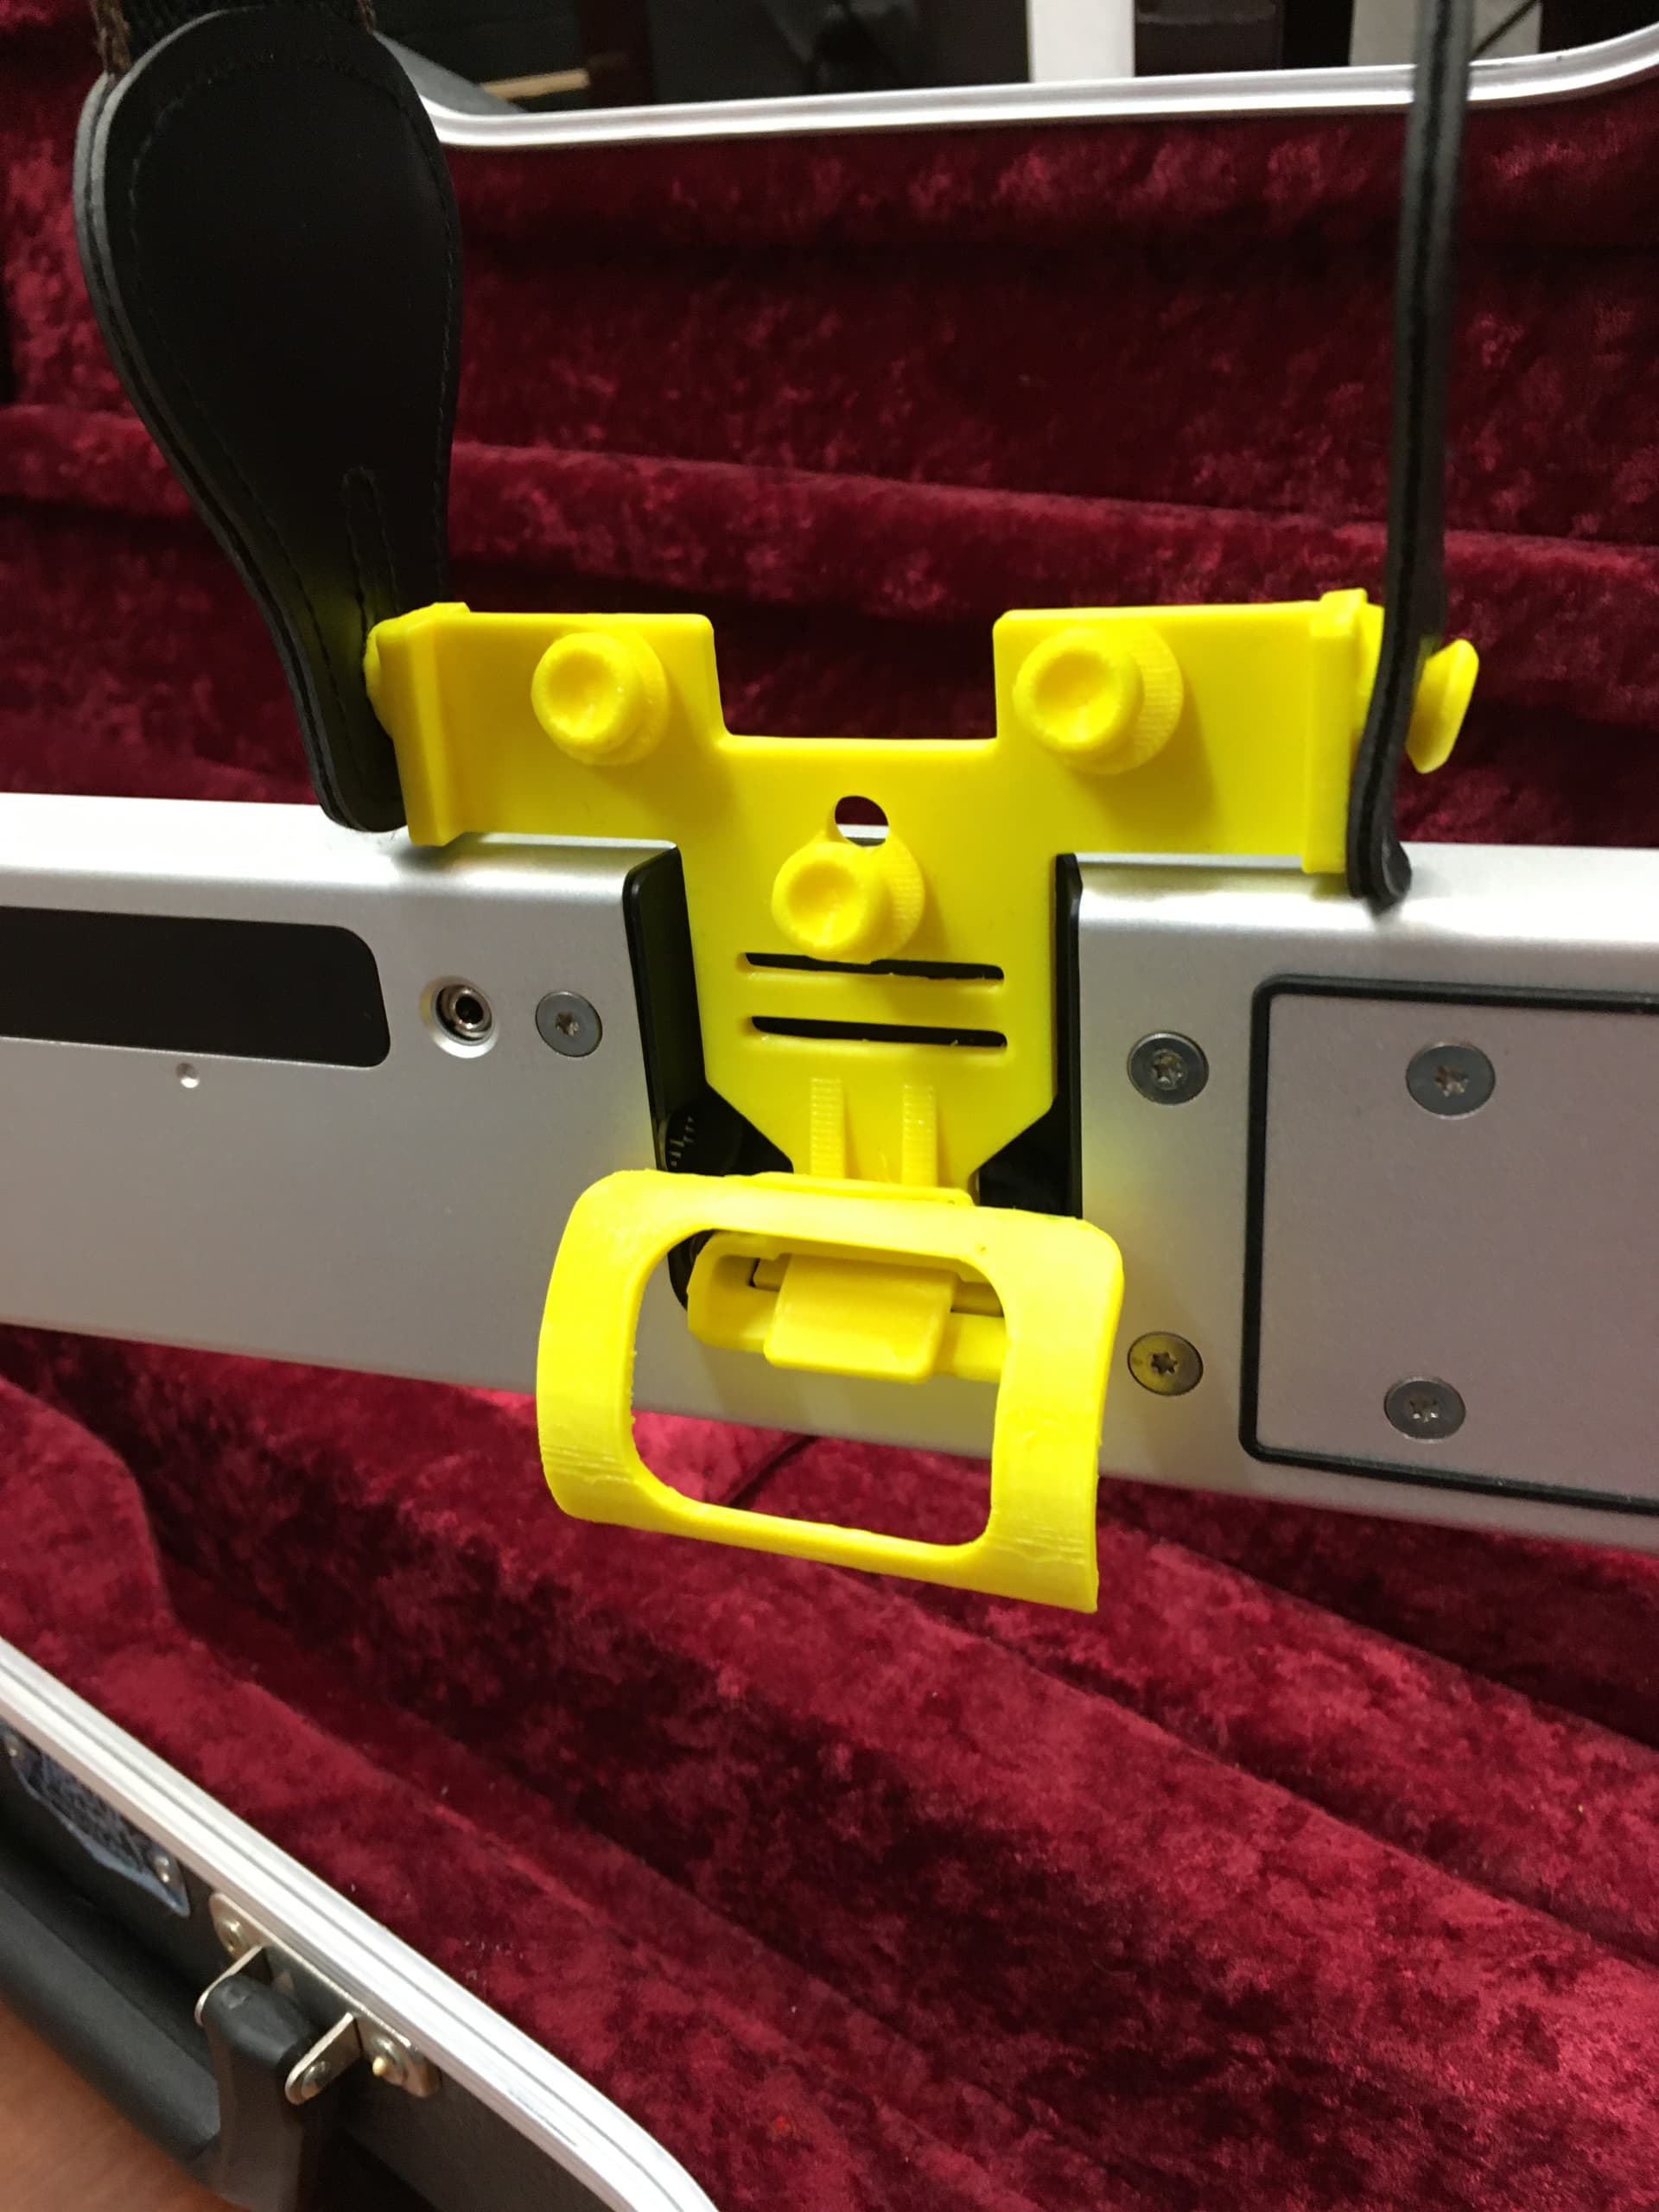
P.S. The buttons are Loxx, which I’m pretty impressed with.
Another update! After using this 3rd version quite a bit, a problem has become apparent: the height of the pin block plus the height of the pin itself changes the center of gravity when it hangs, which twists the face of the Tau too forward and down. Not a lot, but not ideal.
The original strap attaches in the recess which allows the standoff to do its work better in setting the face angle. As much as I liked the idea of being able to choose and attach your own strap buttons, I’m dumping that idea in favor of something more like Kai’s first drawing.
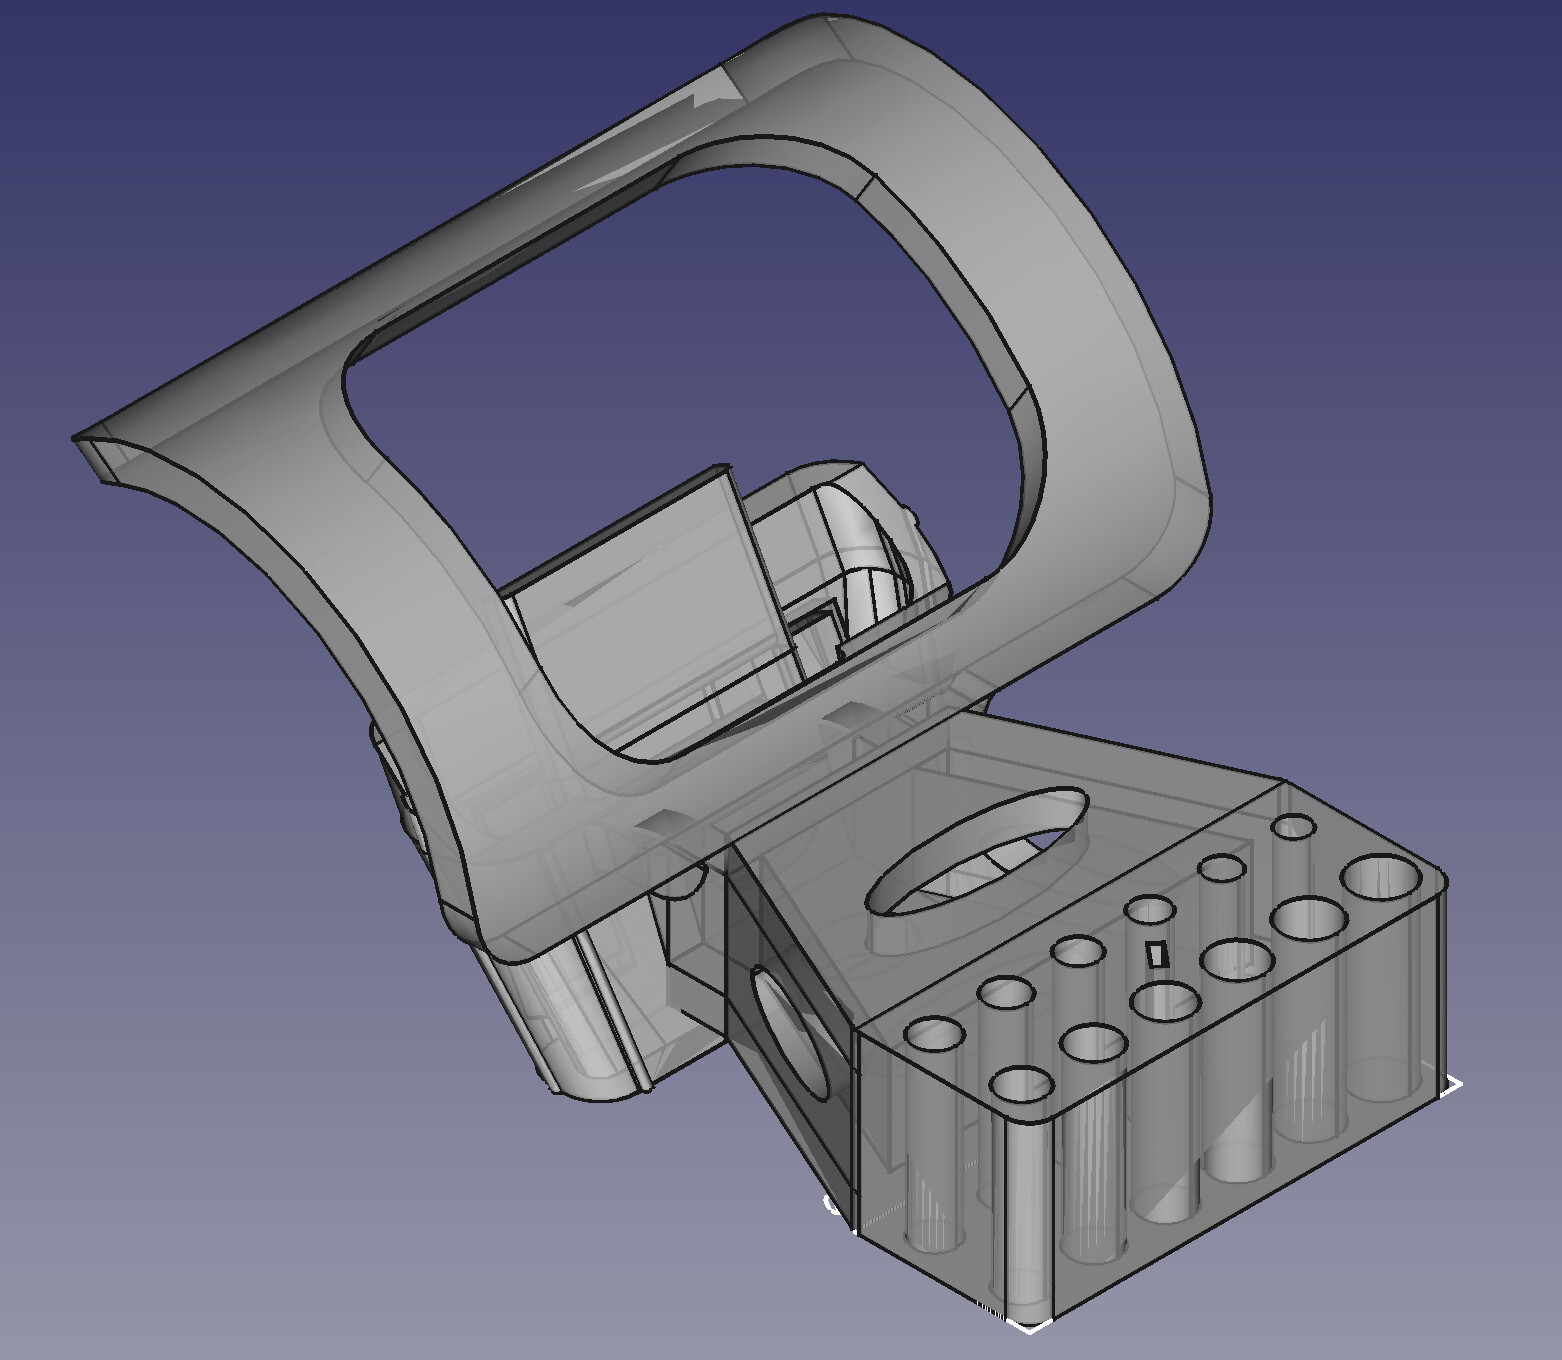
For testing, I made a Frankenstein part that has integrated buttons in 3 positions to try out. It also has a strap slot in roughly the same place as the original, and an eye for connecting a sax-type neck strap. These can also double for connecting a backup safety strap when using buttons in case of an accident.
Once I figure out what layout works best I’ll pare it down. I was a bit worried about the plastic buttons but so far they are pretty sturdy even in PETG. One thing I could do is tap a hole down the center for a machine screw to add strength but in nylon it may not be necessary.
Yep, it works pretty well. It will be interesting to see how a nylon one wears over time due to friction with the bracket. For the latch, there is not much deflection on the part that bends.
Another update: I got a bit side-tracked fixing a couple minor bugs in FreeCAD I ran into (try that with Fusion 360!). But I did get another version printed, this time in nylon using an SLS process. I went with a shop that’s local to me (jinxbot) and I’m pretty happy with how it turned out.
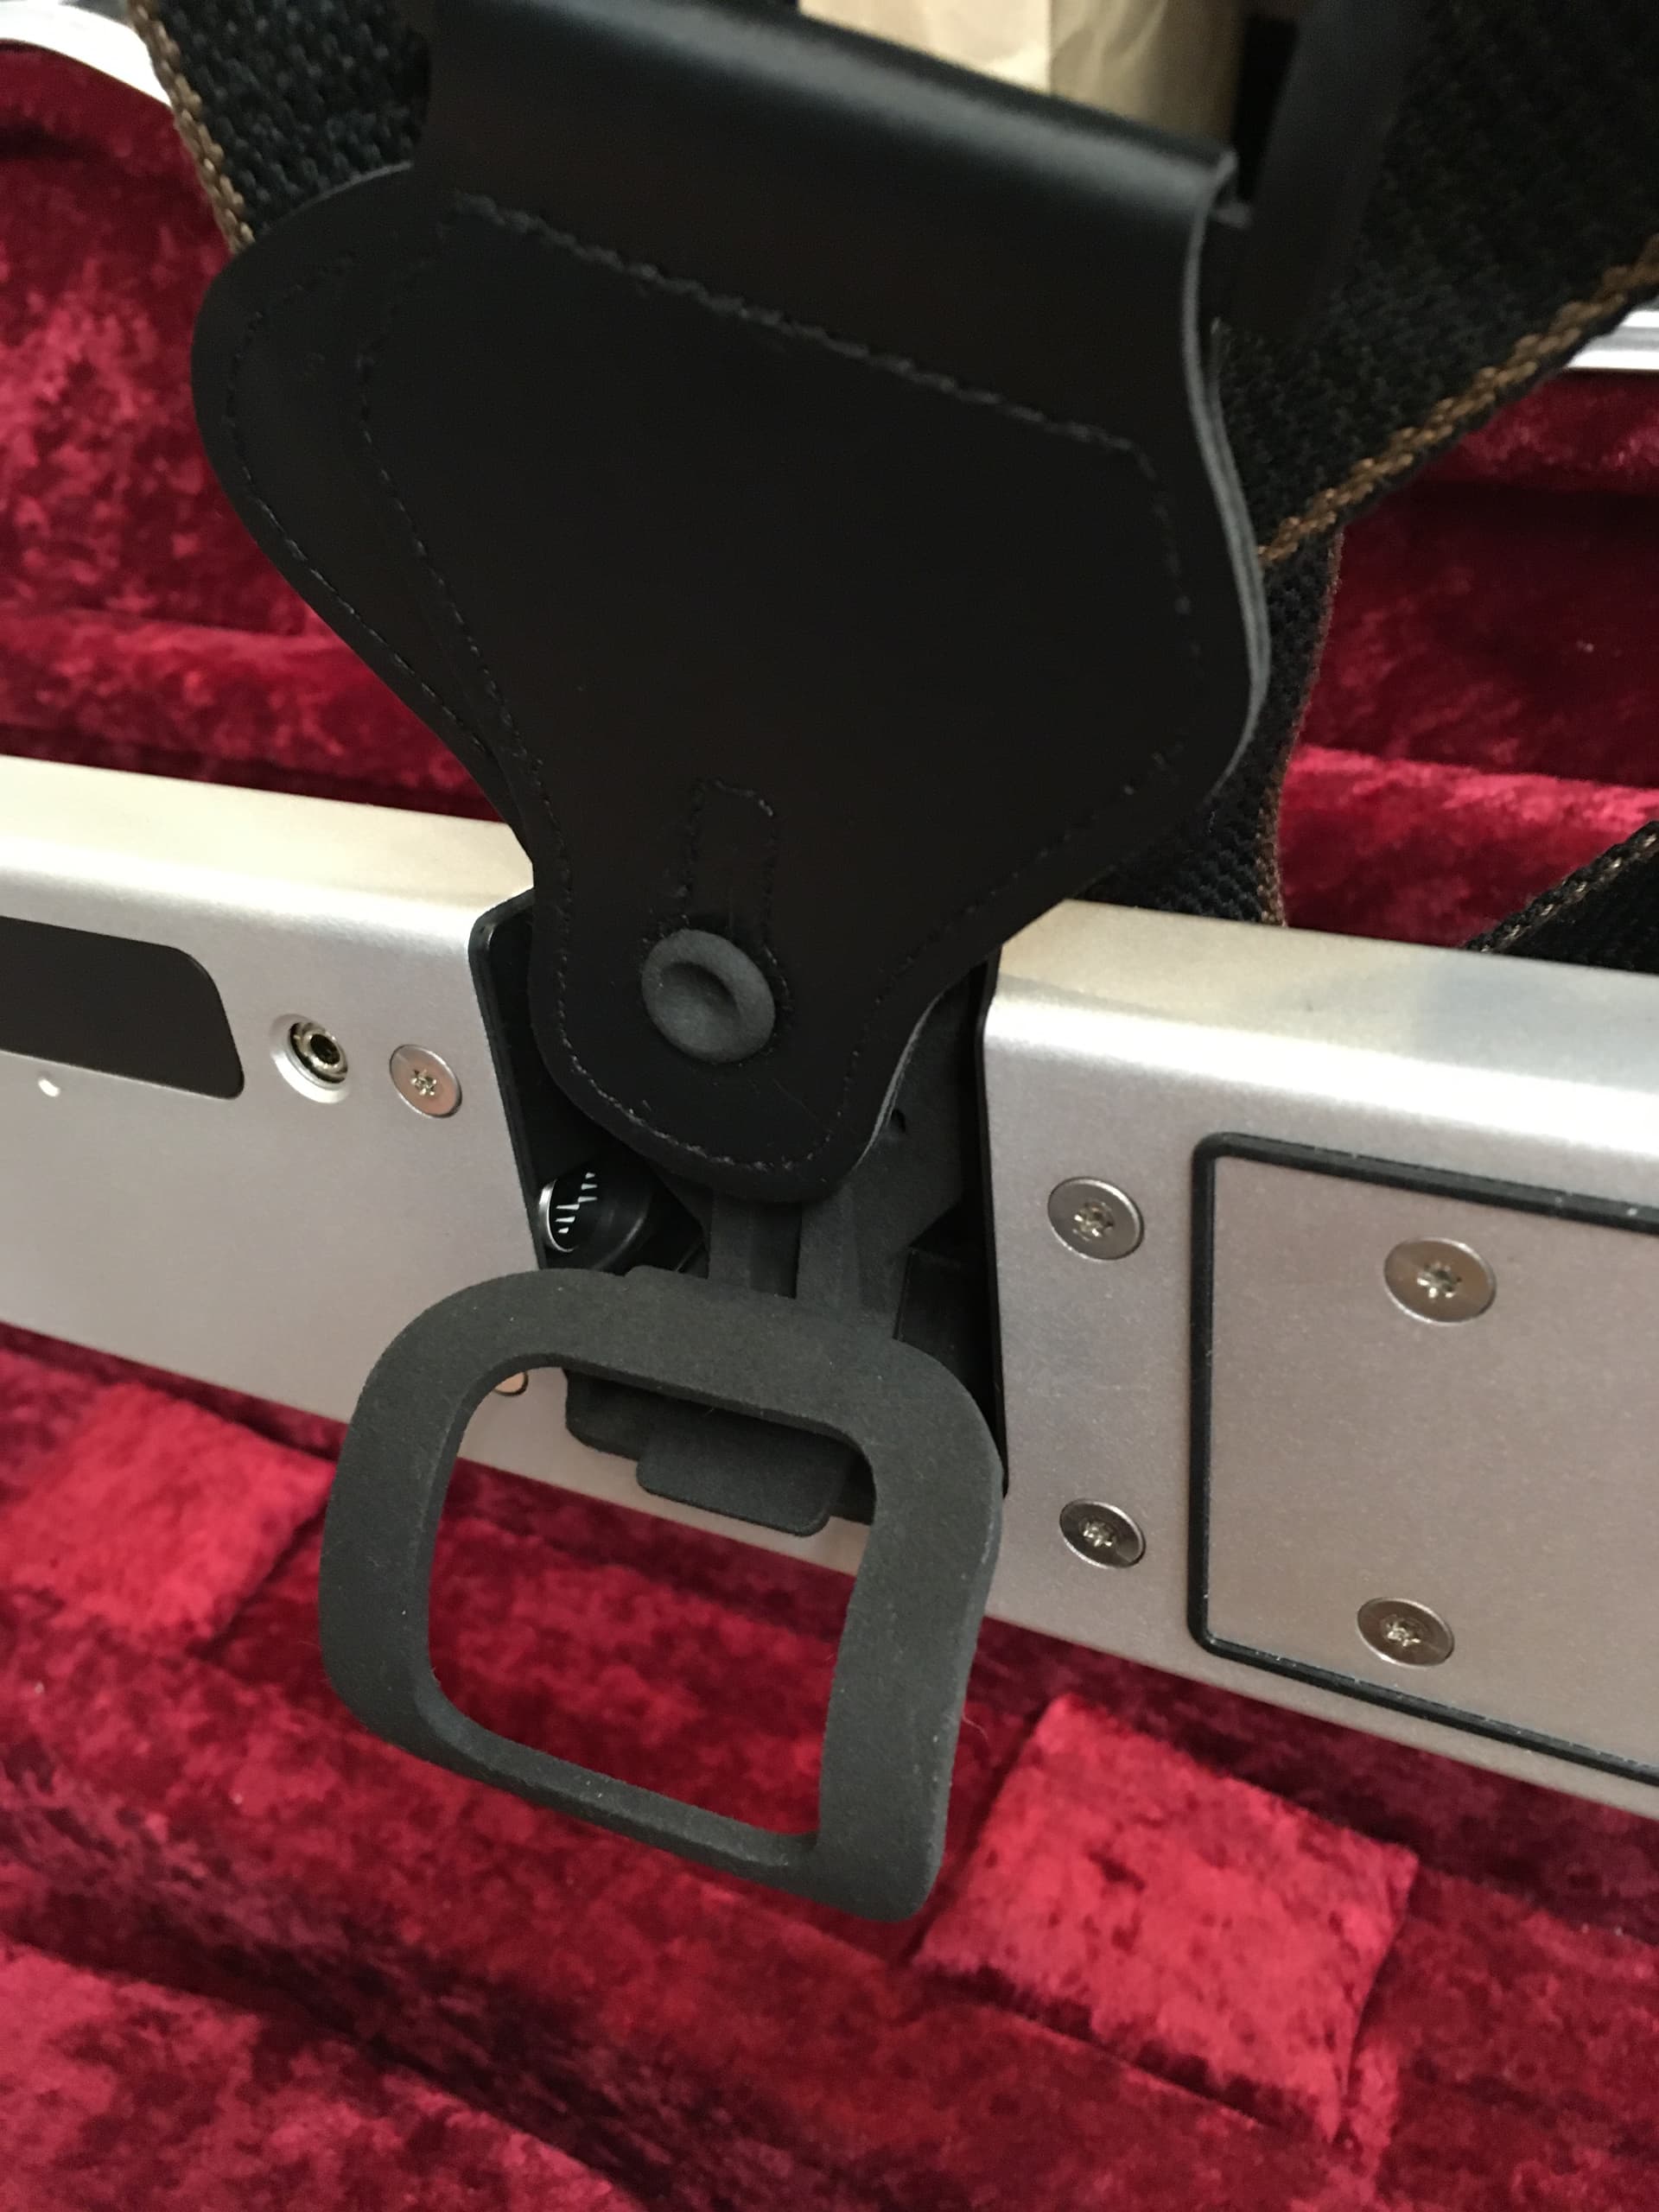
It’s a nice color for this application and the finish is more tactile than with FDM. All you can see from the audience side is the eyelet poking out from behind the body. The eyelet and/or button could be cut if you want to use it with a strap like the official Eigenlabs one.
My dimensions are still a bit off and the fit was a little too tight, but after filing it down some it clipped in pretty well. I’ll play around with this version for a while before I do another run with adjustments but so far it seems pretty functional and sturdy. The standoff is keeping it at a pretty good angle and I’m using the sax-strap eyelet for a safety strap in case the button breaks.
One more view of the back. I reinforced the standoff to make it sturdier since the one on v4 broke That was mostly due to the partial fill with FDM, but still…